Follow these steps the first time you start your new Campus Windows Laptop. Screenshots are included to help guide you through the process.
Quick Reference — Keep This Handy
| Hotspot WiFi Network | My Campus Hotspot |
| WiFi Password (if required) | Campus123! |
| Laptop Login Email | [your username]@pc.campus.edu |
| Temporary Password | C@mpus.edu |
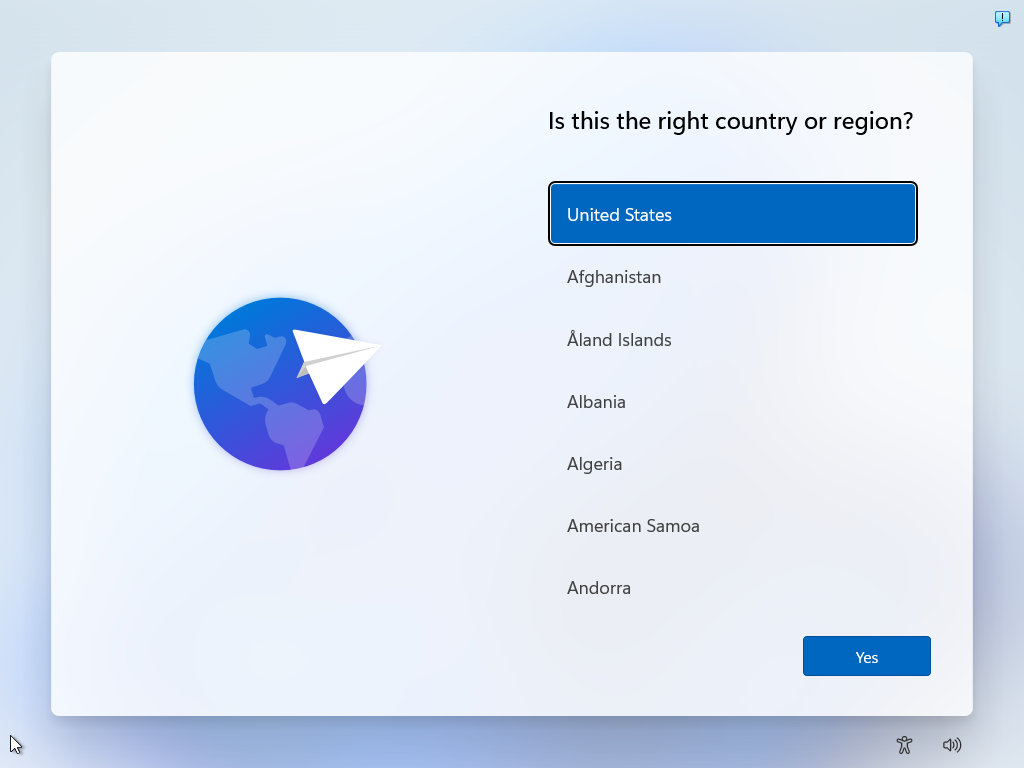
Step 1: Select Your Country or Region
Choose United States and click Yes to continue.
Show Screenshot
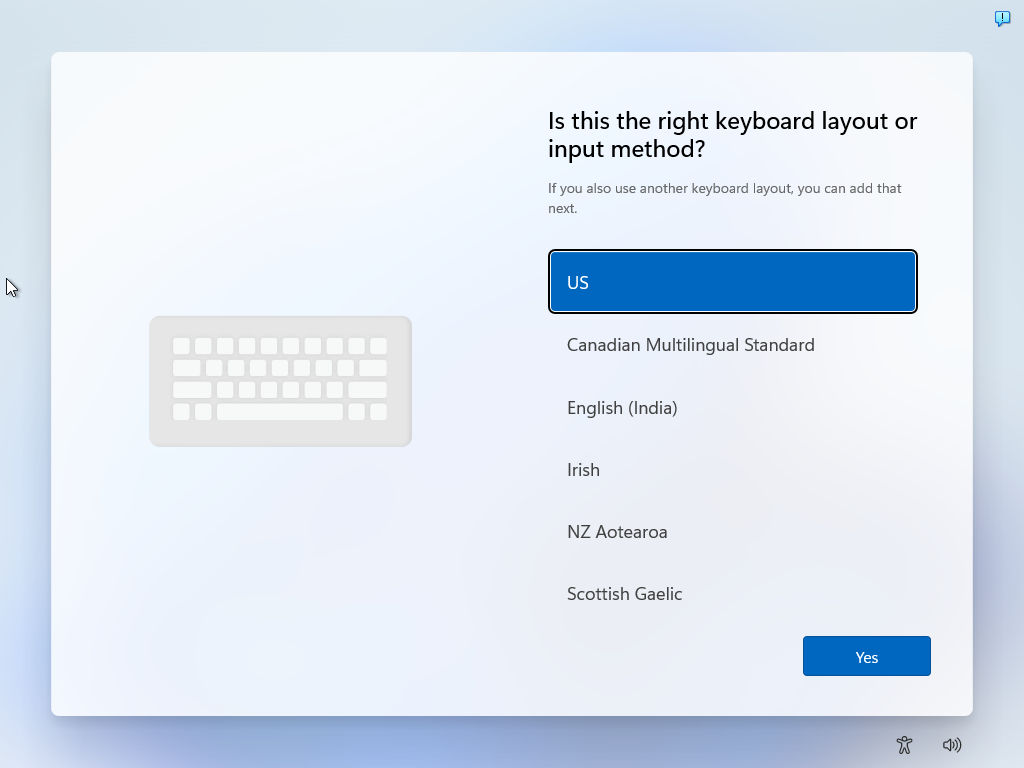
Step 2: Keyboard Layout & Skip Second Layout
Choose your preferred keyboard layout (e.g., US) and click Yes. Then, when prompted to add a second layout, click Skip to proceed.
Show Screenshots
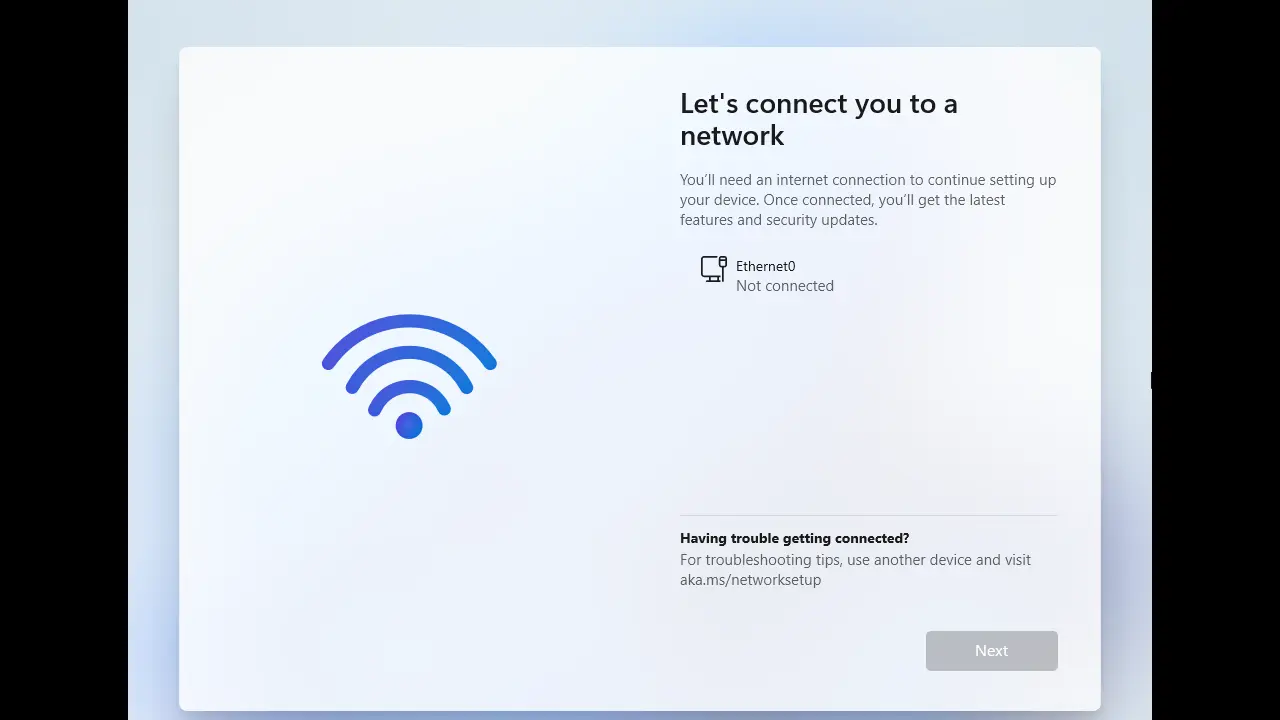
Step 3: Connect to Network
- If you have a TCL hotspot, make sure it is plugged into your laptop. Your laptop should recognize the network connection automatically (it may take a few minutes for the hotspot to connect via the wireless network).
- If you have a standalone hotspot (Jextream) make sure it is turned on and you connect to it via WiFi:
-
SSID (Network Name):
My Campus Hotspot -
Password:
Campus123!
On the left: Select My Campus Hotspot.
On the right: Enter the password, then click Next.
If you are using your own personal network or Wi-Fi, make sure you select the correct Wi-Fi network name from the list and enter the correct password for your network.
Tip: You must be connected to the internet to continue setup. If your hotspot doesn’t appear, make sure it's powered on and visible.
Show Screenshot
Step 4: Sign In to Your Campus Computer
Use the account listed in your Welcome Email, but with the domain @pc.campus.edu.
STOP — Read this before signing in
You have two campus accounts with different endings. Using the wrong email here will lock you out of the initial login.
|
DO NOT use your Google account. Example: jdoe1@my.campus.edu (This is for Gmail, CampusWire, Google Drive — everything except laptop setup.) |
✅ USE your Microsoft account. Example: jdoe1@pc.campus.edu (This is the account from your Welcome Email. Use it only for the initial laptop setup.) |
How to find your correct login:
- Open your Welcome Email from Campus IT. Subject line: Your my.campus.edu Google account details.
- Find your username (e.g. jdoe1).
- Add @pc.campus.edu — not @my.campus.edu.
Note: You will only use the email with @pc.campus.edu to sign in for the initial laptop setup. For everything else (CampusWire, Campus email, etc.), use the email with @my.campus.edu.
1. Enter your computer login
Show Screenshot
2. Enter your temporary password
Temporary Password: C@mpus.edu
(Note: This is your password, not an email address. It contains an @ symbol.)
Show Screenshot
3. Update your password (first time only)
You’ll now be asked to create a new password.
- Type the temporary password in the “Current password” box.
- Choose a new password you’ll use going forward.
Show Screenshot
Tip: This login is only for your computer. Use the address listed in your Welcome Email for Gmail and other apps as usual.
Step 5: Device Setup in Progress
After signing in, you'll see a screen that says “Setting up for work or school.” This means your device is getting configured.
The screen shows three phases:
- Device preparation
- Device setup
- Account setup
Show Screenshot
Allow about 10–20 minutes for this to finish. Your device is installing required settings and apps in the background.
Show Progress Screen
Tip: If this screen doesn't finish in under 30 minutes, try restarting your device. Then sign in again with your @pc.campus.edu account to resume the setup.
Step 6: Set Up Windows Hello for Business (Fingerprint or PIN)
On the laptop you’ll notice a fingerprint sensor located near the trackpad—it looks like a small, square metal pad.
Show Sensor Photo
What to Expect Next:
1. Windows Hello Prompt
Show Prompt Screenshot
2. Fingerprint Setup (Optional)
- Tap the sensor repeatedly when prompted.
- You’ll feel a vibration or see progress as your fingerprint is scanned.
3. PIN Setup (Required)
Show PIN Setup Screenshot
- Enter a secure PIN when prompted.
- This PIN will safeguard your device if you choose not to use biometrics.
Tip: Setting up a fingerprint is optional, but the PIN is required. It’s the fastest way to sign into your computer if you don't opt for biometrics.
Step 7: Welcome to Campus
When setup finishes, you’ll arrive at the Windows desktop. Your apps and shortcuts will already be in place, and your computer is ready to use.
Show Desktop Screenshot
Welcome to Campus!
From here you can:
- Open Chrome from the taskbar.
- Launch Campuswire using the pinned shortcut.
- Use Office apps (Word, Excel, PowerPoint, Outlook, OneNote, Access) already installed.
Need Help?
If you run into any problems, Student Technology Support (STS) is here for you:
- Email: it@campus.edu
- Phone: (877) 257-2834
- Support Portal: campuswire.com > Tech Help